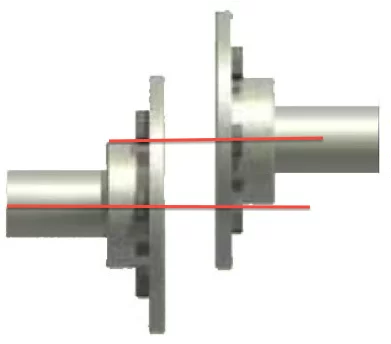
Picture 1: Offset, or Parallel – the shafts are parallel to each other, but are not co-planar, or in the same plane. This can be both vertical and horizontal.
•Offset or Parallel Misalignment is measured in thousandths of an inch (0.000”), also called mils.

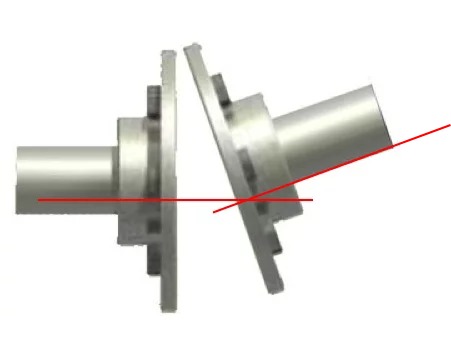
Picture 2: Angular – the shafts are not in the same plane, which causes a difference in measurement between measurements made 180 degrees opposite on the coupling faces.
•Angular Misalignment is measured in thousandths of an inch (0.000”), or mils, per inch of coupling diameter.

It’s almost always a combination of both!


